This is for you if you film on your phone and everything looks perfect when you're watching the footage... Then when you go to edit, the video and audio do not match!
The best way to fix this issue is to prevent it from happening in the first place! So let's talk about why it might be happening.
And then explain how to fix it. Because I'm sure you don't want to go back and refilm.
Why does my audio and video not match when editing?
You're not using the correct frame rate in your video editing software.
Check the frame rate you used to film matches frame rate of your video editing sequence.
Popular frame rates include 24, 25, 30, 48, 50, and 60fps. Standard frame rates also change by country.
Phones often have less options than cameras and might not match what film settings are typically used in your country.
Your footage has a variable frame rate(VFR).
Typically happens when filming on phones.
It can also happen with screen recorders and webcams.
Mobile phones do this to maintain a compression level or for improved performance.
At the time of writing this, there are no easy ways to prevent this from happening. So how do you fix it? We'll explain it in the next section.
There's a glitch
Turn the program on and off.
Delete the file in software and re-upload.
We know you've probably tried this, but we had to add it!
How to fix audio and video sync issues when editing?
This is how to fix your mismatched audio and video caused by variable frame rates.
Firstly, some software do support this. If you do use multiple video editing software, I would recommend that you test the video in a different video editor.
However, if it still not working this is how you convert the footage from a variable to a set frame rate:
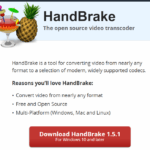
Download HandBrake. This is a free free and open-source transcoder for digital video files.